The pattern: How to remotely access a service that is bound to localhost and refuses to respond to requests not originating from localhost? The instance: If using Speedify CLI on a linux-based router with no GUI stack, how to nevertheless view the Speedify GUI in a web browser, from another device on the same network? This post documents some non-conventional hacks needed to get a working solution.
You can jump straight to the actual solution, or read through the background and tinkering that preceded the actual solution. The last section of this post also describes an alternative solution contributed by a reader of this blog.
Background
In a couple of previous blog posts, I described using a service named Speedify to simultaneously utilize two different Internet connections. Speedify’s command line client executes on a Linux router that runs Ubuntu Server 20.04 without a graphical interface. The lack of a graphical interface means that Speedify’s nice and useful UI is not available.. or is it? I figured out a way to access Speedify’s UI while running the CLI client on a headless server with no GUI desktop installed 🙂
Understanding how Speedify’s GUI works
This endeavor wouldn’t have succeeded without some serendipity and dogged tinkering. It all started when I was running the Speedify client on my MacbookPro. On starting the client, Activity Monitor showed a process listening on localhost:9331. Curious, I typed that into a web browser and hey presto! saw Speedify’s GUI in the browser. So it seems that the Speedify GUI is essentially a locally served web page and the Speedify client (at least for Mac) is just a thin application window around the web page.
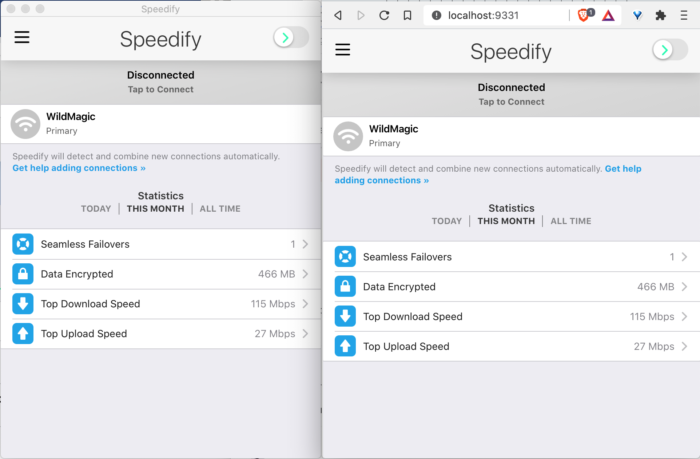
So maybe, if Speedify CLI is running on a device, the GUI can be accessed by accessing device_ip_addr:9331 in a browser from another computer? Seemed worth a shot. Unfortunately, it is not that straightforward.
Speedify’s GUI in a browser on Linux
By chance, I was running the full Speedify client on a computer with a Linux Desktop. Unlike on the Macbook, there was no process listening on localhost:9331 when the full Speedify client is started on Linux. However, in the /usr/share/speedifyui/files folder, I noticed files that looked suspiciously like those that would be served by a web server. So I went to that directory and started a local webserver
cd /usr/share/speedifyui/files
python3 -m http.server
the above command starts a webserver listening on all interfaces at port 8000. Typing localhost:8000 in a web browser on the same machine shows the Speedify GUI. Bingo! Unfortunately, typing eth_ip_addr:8000 in a web browser from another computer on the network does not work. An interface does come up, but all it shows is a blue button, clicking which achieves nothing.

The Javascript console shows that the page is unable to access a websocket on port 9330 on the computer running Speedify. On that computer, lsof -i :9330 indeed shows that Speedify is listening on port 9330. However, after some testing, it became clear that while the service binds to port 9330 on all interfaces, it only responds to requests from localhost i.e. 127.0.0.1. Well, we should be able to work around this with some iptables magic, right?
Iptables magic
The LAN facing static ip address of the router is 192.168.3.1 . As mentioned above, firing up a webserver on port 8000 and accessing it via 192.168.3.1:8000 does not work. However, accessing it via 127.0.0.1:8000 does work. The reason is that upon page load, some javascript try to access ws://192.168.3.1:9330 in the former case, but the websocket connection gets closed immediately. In the latter case, access to ws://127.0.0.1:9330 works well. So I tried using iptables to DNAT all requests on ports 8000 and 9330 on the external ip to the internal ip
sudo iptables -t nat -A PREROUTING -d 192.168.3.1/32 -p tcp -m tcp --dport 9330 -j DNAT --to-destination 127.0.0.1:9330
sudo iptables -t nat -A PREROUTING -d 192.168.3.1/32 -p tcp -m tcp --dport 8000 -j DNAT --to-destination 127.0.0.1:8000
This should make it appear to Speedify that the connection requests are originating from localhost. But with the above two rules, the connections were dropped at the routing table. After a bit of searching, I realized that the kernel does this on purpose. It refuses to route packets with the loopback as source or destination because that qualifies as a martian packet. The solution was to enable the route_localnet flag. As stated in the kernel documentation:
sudo sysctl -w net.ipv4.conf.enp3s0.route_localnet=1
Now, the packets made their way to the listener on 127.0.0.1:9330, but still the websocket connection failed. Why? Perhaps, the server could see the originating ip in the packet header as not being localhost and so was terminating the connection? So I tried SNAT’ing the connections
sudo iptables -t nat -A INPUT -d 127.0.0.1/32 -m conntrack --ctstate DNAT -j SNAT --to-source 127.0.0.1
Doing both DNAT and SNAT on the packets this way impacts throughput, but this isn’t an issue for just the couple of connections I expected to have. Now, the packet should truly appear to be originating from localhost. Funnily enough, even with this, the websocket connection could not be established. At this point, I gave up for a few days until I accidentally came across a statement in this page on writing websocket servers: Tip: All browsers send an Origin header. You can use this header for security (checking for same origin, automatically allowing or denying, etc.) and send a 403 Forbidden if you don’t like what you see. A quick test with curl showed that the websocket server was indeed closing the connection during the handshake with a 403 message. So the solution would be to spoof the origin header, right? Turns out, this is not possible. As described on MDN; Origin is a ‘forbidden’ header, meaning that its value can not be changed programatically by the browser. Well, dang! But hey, is it possible to mangle the origin header on the server-side, before passing the request to the websocket server? With a reverse proxy maybe?
Nginx reverse proxy
nginx can indeed alter headers using the proxy_set_header directive. So I modified the iptables rule above to DNAT requests on 192.168.3.1:9330 to 127.0.0.1:9331 and setup an nginx reverse proxy listening there. The reverse proxy mangles the Origin and Host headers, then forwards the request to the websocket server on 127.0.0.1:9330
server {
    listen 127.0.0.1:9331;
    server_name nasbox;

    location / {
      proxy_set_header Origin http://127.0.0.1:8000;
      proxy_set_header Host 127.0.0.1;

      proxy_pass http://ws-backend;

      proxy_http_version 1.1;
      proxy_set_header Upgrade $http_upgrade;
      proxy_set_header Connection "upgrade";
    }
}

upstream ws-backend {

    server 127.0.0.1:9330;
}
paste the above in a file, say /etc/nginx/sites-available/router.conf and enable it. With this, we now have a somewhat convoluted pipeline
- Packets from another computer on the network reaches router’s ip address on ports 8000 and 9330
- Iptables will DNAT the packets:
192.168.3.1:8000 -> 127.0.0.1:8000and192.168.3.1:9330 -> 127.0.0.1:9331. Nginx is listening at the latter location - Nginx will mangle the http request Origin and Host headers to localhost and forward it to
127.0.0.1:9330
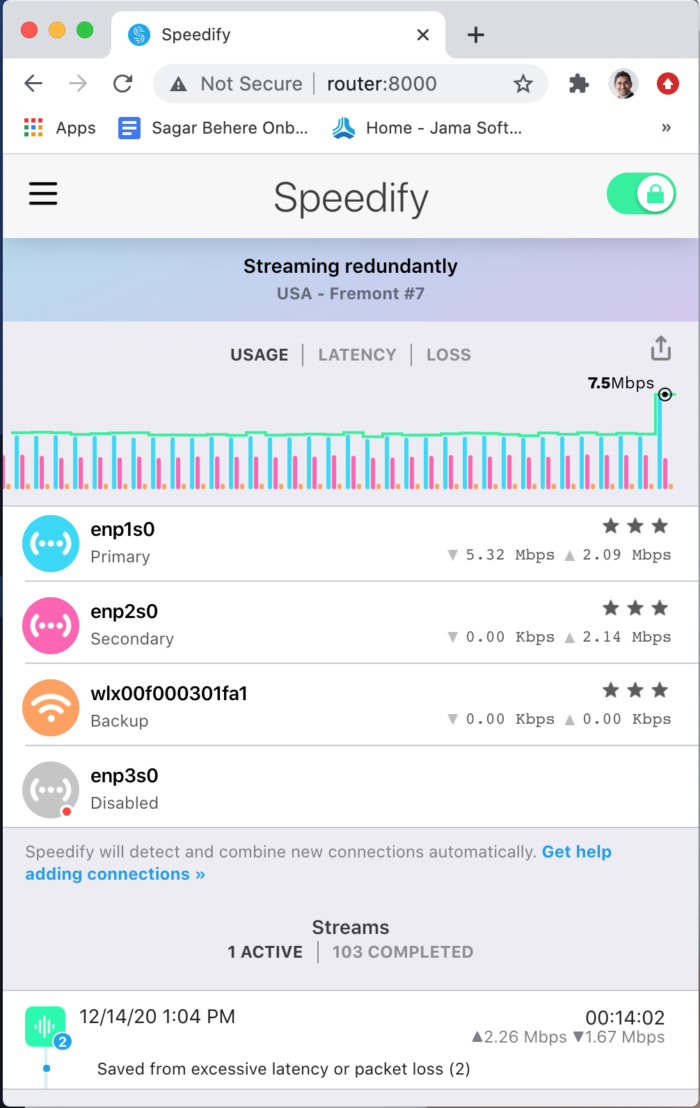
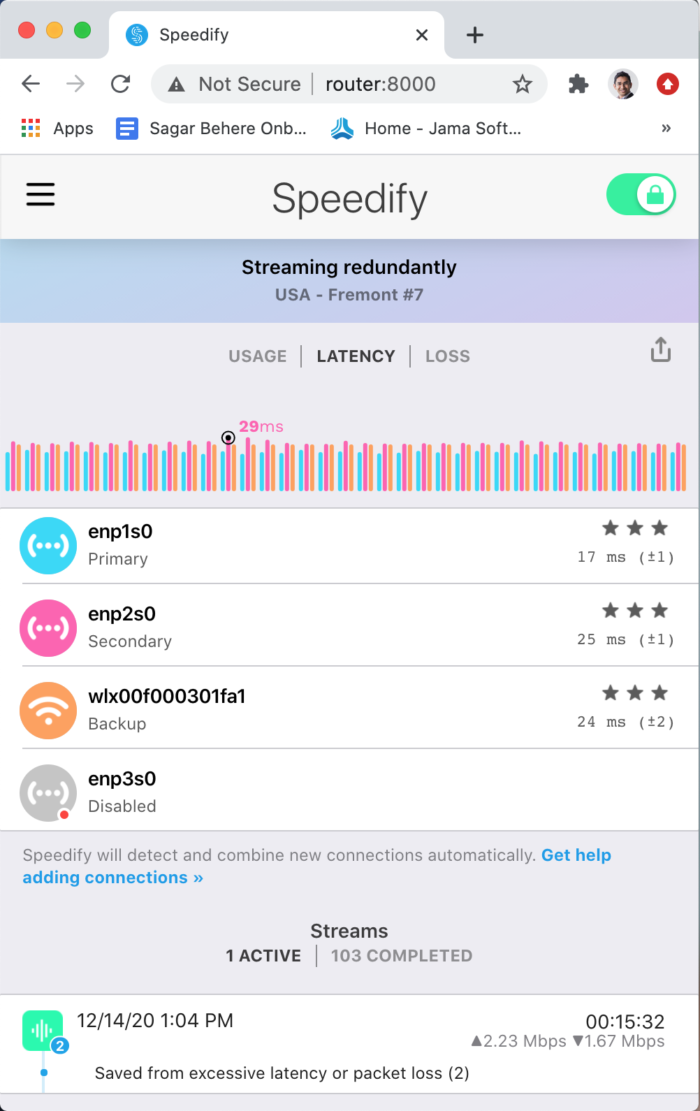
Thus, the services listening on 127.0.0.1 ports 8000 and 9330 should have no way to determine that a request has originated from anywhere other than 127.0.0.1. Now, typing 192.168.3.1:8000 on a web browser from any other computer in the network indeed shows up the Speedify GUI. Mission accomplished 😀
All together: The actual solution
This section collects all relevant commands in one place. Note that in case only the Speedify CLI was installed, as explained in the previous blog post, you need to first download the speedifyui package and extract the files needed to serve the GUI client with a web server. Do that with
sudo apt download speedifyui
sudo dpkg-deb -x speedifyui_deb_file_name.deb .
sudo mv ./usr/share/speedifyui /usr/share
Then, enable route localnet and set up the iptable rules
sudo sysctl -w net.ipv4.conf.enp3s0.route_localnet=1
sudo iptables -t nat -A PREROUTING -d 192.168.3.1/32 -p tcp -m tcp --dport 9330 -j DNAT --to-destination 127.0.0.1:9331
sudo iptables -t nat -A PREROUTING -d 192.168.3.1/32 -p tcp -m tcp --dport 8000 -j DNAT --to-destination 127.0.0.1:8000
sudo iptables -t nat -A INPUT -d 127.0.0.1/32 -m conntrack --ctstate DNAT -j SNAT --to-source 127.0.0.1
Then, set up an nginx reverse proxy as described in the section above. Head to /usr/share/speedifyui/files and type
python3 -m http.server
And now, you should be able to access Speedify’s GUI from any computer on the network by typing http://192.168.3.1:8000 in the browser.
Alternative solution (Thanks to Bill Nickless)
Bill Nickless wrote to me with an alternative solution that is MUCH simpler than the one mentioned above. It requires no fiddling with the server, but it does require a specific configuration on each client that wishes to access the Speedify GUI on the server. Bill’s solution is to enable SSH port forwarding on the client computer that wishes to access the Speedify GUI with a browser. More precisely, local ports 8000 and 9330 on the client computer are forwarded to the Ubuntu server running Speedify. SSH port forwarding can be done with PuTTY on Windows and there are a number of guides explaining how to do that. For Mac OS and Linux, SSH port forwarding can be accomplished through the command line with single command that forwards the ports and starts a webserver on the remote server that serves the Speedify GUI. This command is
$ ssh -L 8000:127.0.0.1:8000 -L 9330:127.0.0.1:9330 user@server-ip-address "cd /usr/share/speedifyui/files ; python3 -m http.server"
Now, open a browser on the client computer, type address http://localhost:8000 and the Speedify GUI should show up. Thank you, Bill!